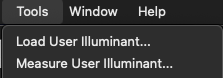
Measure
Tool to measure colormanagement charts.
MYIROtools includes several charts for creating ICC Profiles.
In addition you will find definitions to measure typical standard charts like IT8/7.4 or TC1617.
The tool "Measure" is used to take measurements using a compatible measurement device.
Compatible instruments are:
- MYIRO-1
- MYIRO-9
- Konica Minolta FD-9
- Konica Minolta FD-5BT
- Konica Minolta FD-7
You can select
Auto: MYIROtools scans your network and USB ports for all connected instruments
Model: MYIROtools scans your network and USB ports for connected instruments of the selected model
Instrument: Instruments that were found (the serial number and port is shown) can be selected
Rescan repeats the search.
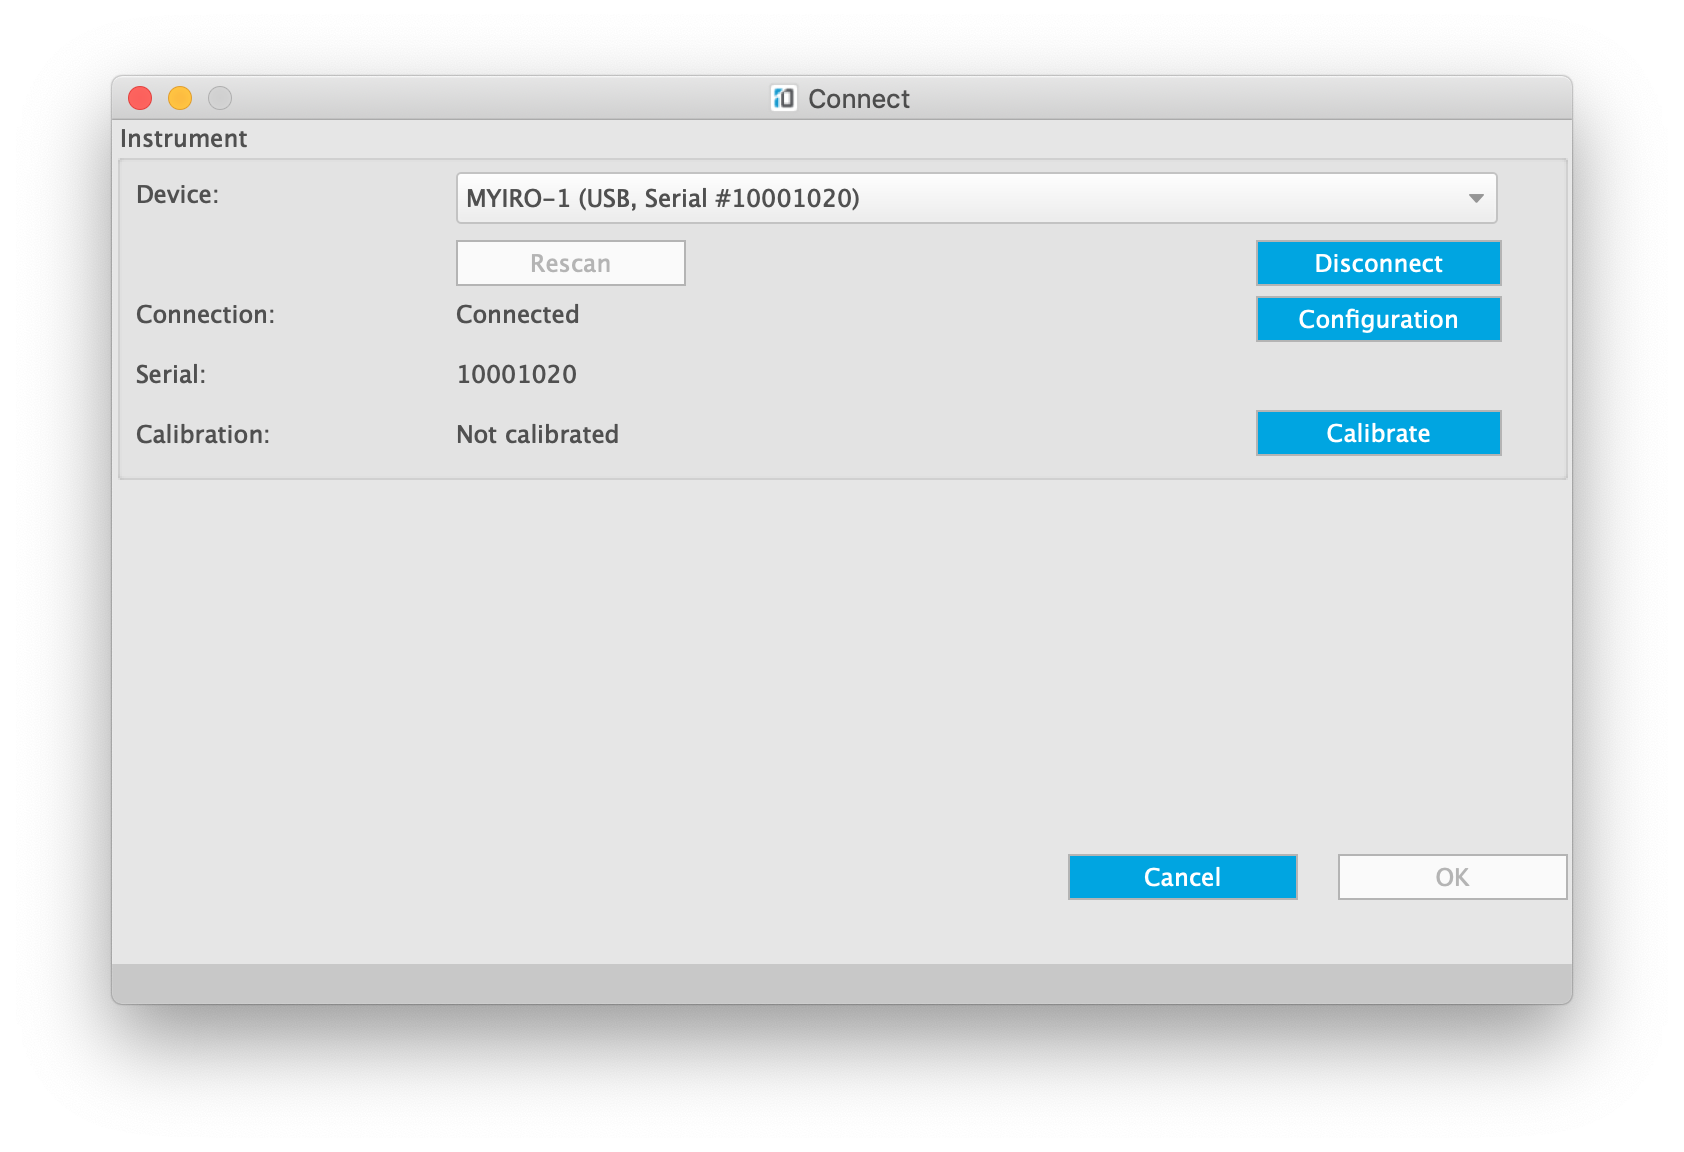
If your instrument was found, select it from the list and click "Connect".
If your instrument was not found please check the USB or network connection and make sure that the instrument is switched on.
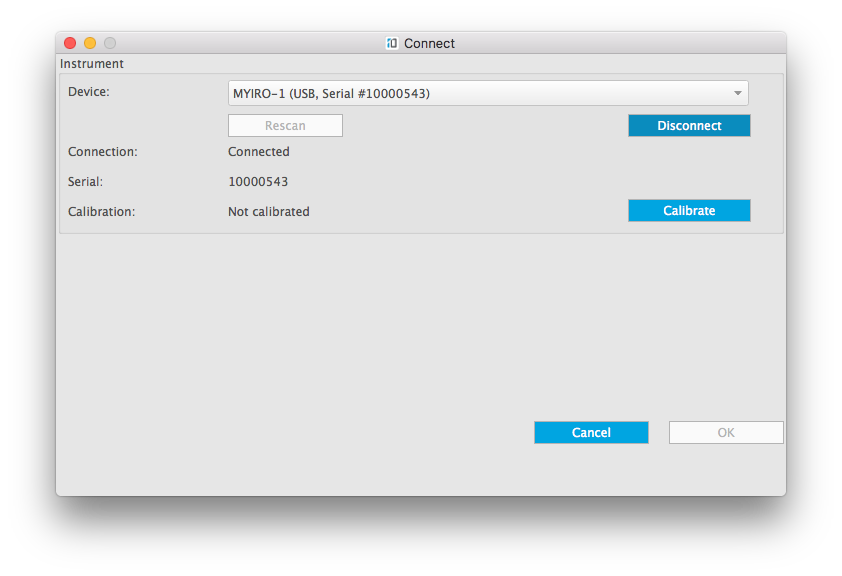
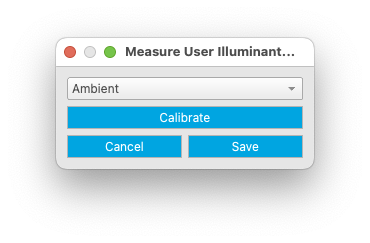
If your instrument needs a manual calibration (like MYIRO-1), attach the white calibration cap and click "Calibrate" or press the measurement button.
If the calibration status is "calibrated" you can skip this step.
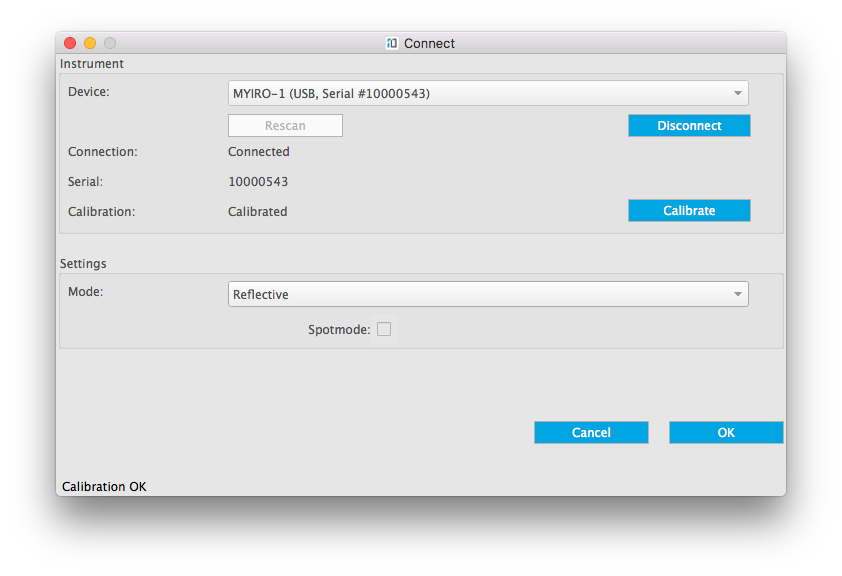
you can choose the measurement mode (depending on your instrument).
- Reflective: Used to measure prints
- Emissive: Used to measure light sources
Then click "OK"
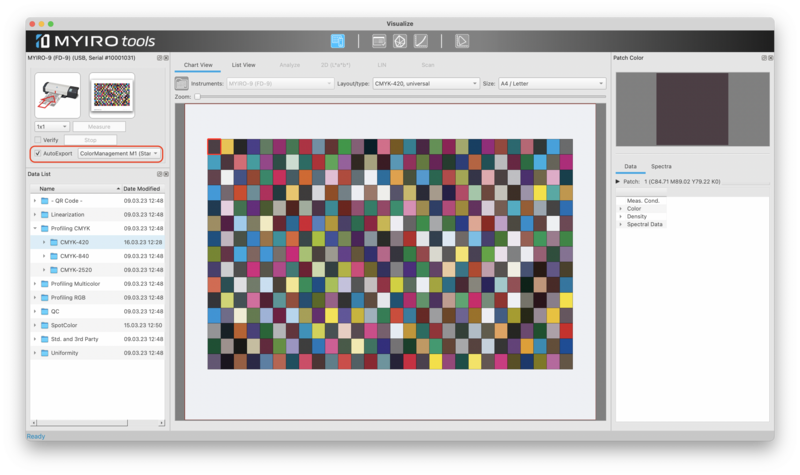
Before starting a measurement you can activate the checkbox "AutoExport".
MYIROtools will export the measurement data automatically.
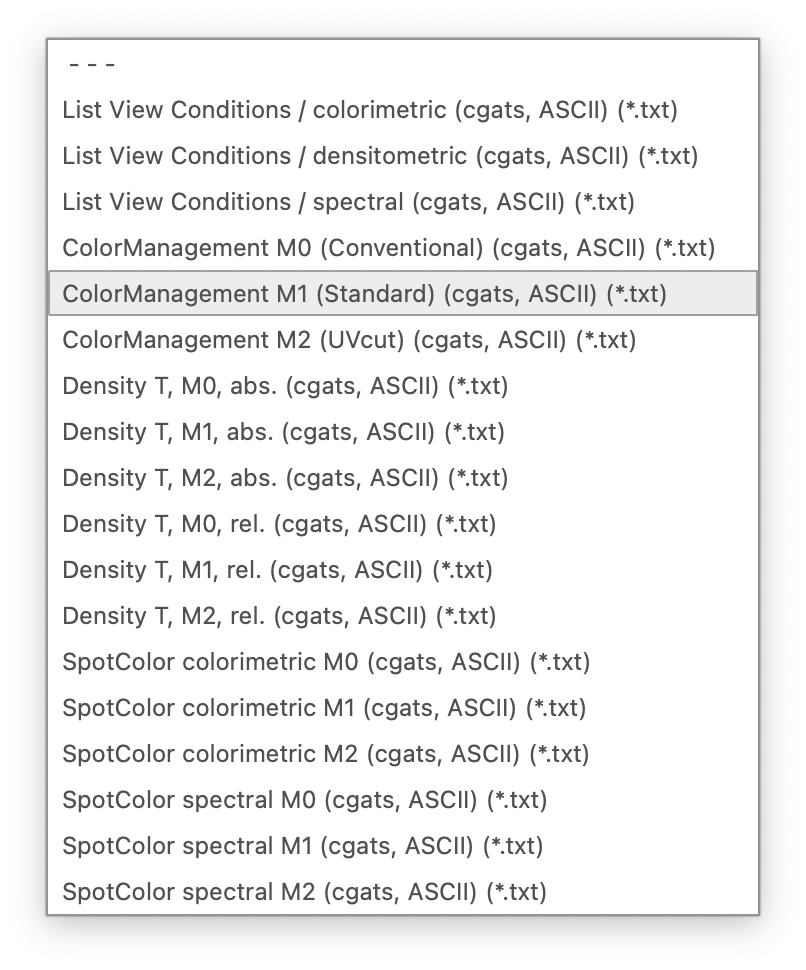
After having activated the checkbox "AutoExport" you need to select an export setting.
This setting defines the format of the exported data.
After having selected a setting you can choose the folder where to export the data into.
Default is the previously selected folder. If it is the first measurement after having opened the measurement tool the default is the folder "Desktop".
To change the folder simply select an export setting again.
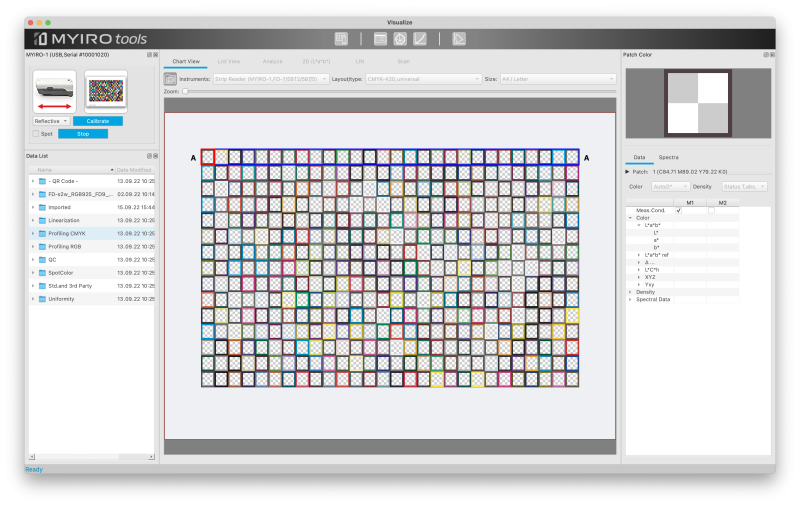
Compatible Strip-Readers are MYIRO-1, FD-7 and FD-5BT.
They measure a chart by scanning it line by line.
To start a new measurement, select the chart you want to measure and click "New measurement".
The patches of the chart will change to look like transparent.
This indicates that there is no measurement value for this patch.
After you measured a line the patches will get filled with the color representing the measured value.
MYIROtools indicates the next line to be scanned by a blue box around it.
You can change it by clicking onto a different line.
All measured data are constantly saved in your working folder.
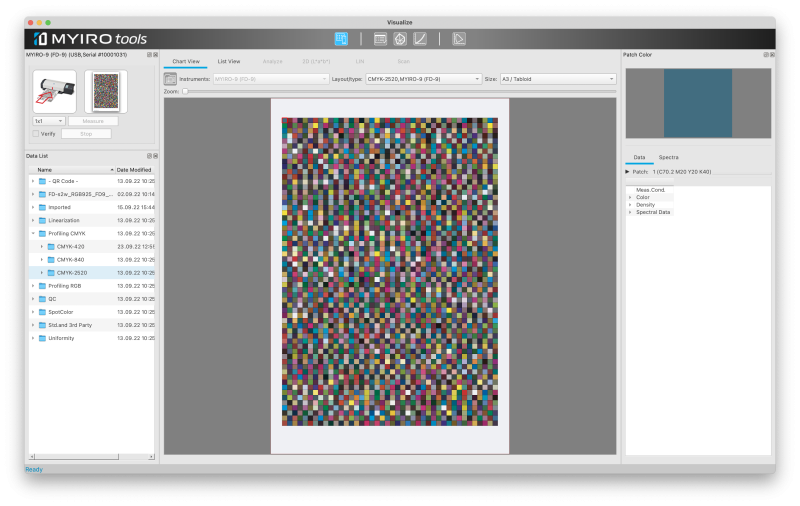
A chart reader like the MYIRO-9/FD-9 is an instrument that performs all measurements automatically.
When you open the measurement tool and selected a chart, at the bottom left corner MYIROtools states "Please insert chart".
Insert the chart centered into the MYIRO-9/FD-9.
The MYIRO-9/FD-9 will start to recognize the chart and then measure it automatically.
After the measurement is finished the data is automatically saved.
The MYIRO-9/FD-9 has a built-in image scanner. The scanned image is used to determine the chart position.
The scan tab shows the scanned image and the detected patch positions.
Although the image is a grayscale image, the measurement points use the device values (CMYK, RGB, N-Color) to show the expected color as outline. After a measurement the center points are filled with the measured color values.
In case the software is not able to locate the chart position automatically a grid is shown.
This can happen especially if a chart or control wedge is surrounded by a lot of other layout elements.
Another case are some linearization charts where the light tone values have very little contrast to paper white.
The grid can be adjusted as follows:
Position: Grab the grid inside its boundaries and move it
Size: Grab the right or bottom border to adjust the grid's size
To connect MYIRO-1 using WLAN to your computer you have to setup some details first.
- Connect MYIRO-1 using the USB cable to your computer and switch it ON.
- Start MYIROtools Measure
- Scan for connected instruments
- Select your MYIRO-1
- Click Configuration
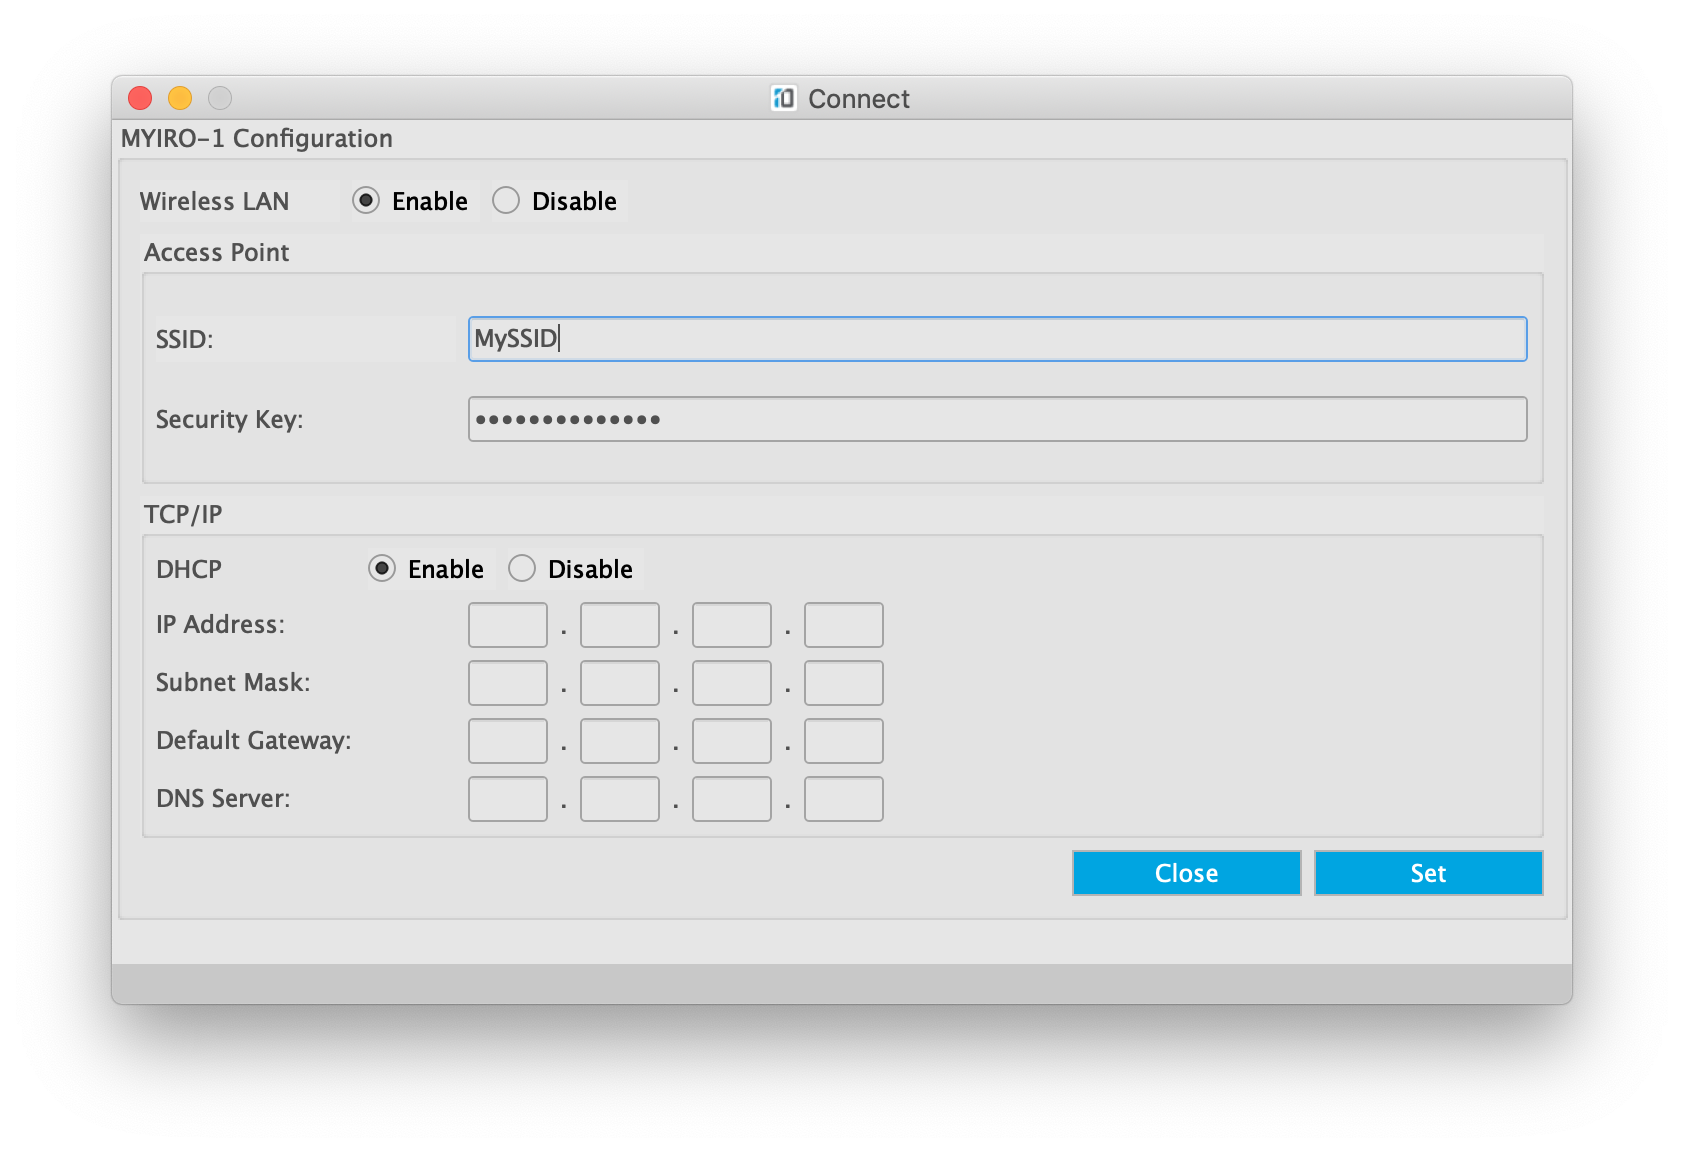
Allows you to enable or disable WLAN.
When it is enabled you can enter the details of your WLAN access point.
SSID: Name of your network
Security Key: Password
You can decide to use DHCP or a fixed TCP/IP setup.
Please ask your network administrator in case of doubts.
After you finished to enter all details click "Set".
Restart your MYIRO-1 by switching it OFF and then ON again.
To your computer you have to setup some details first.
Connect MYIRO-9/FD-9 using the USB cable to your computer and switch it ON.
- Start MYIROtools Measure
- Scan for connected instruments
- Select your MYIRO-9/FD-9
- Click Configuration
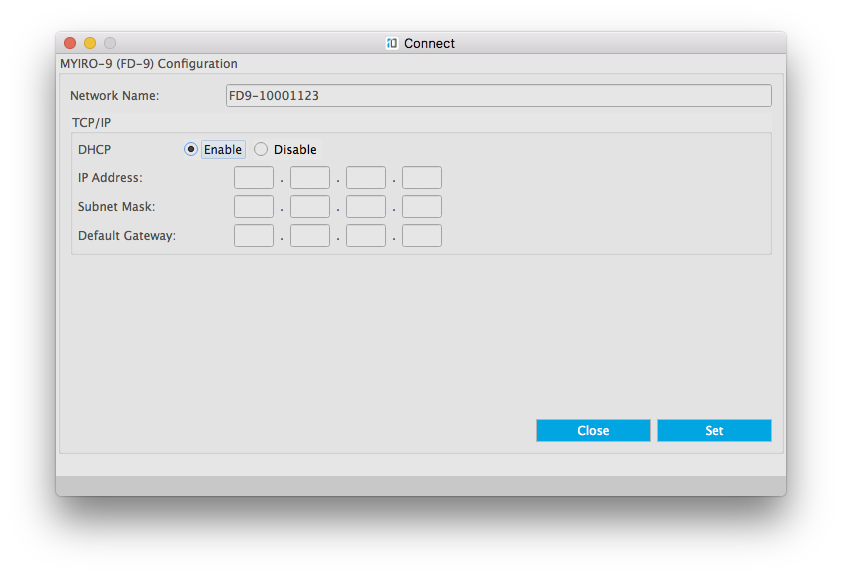
Allows you to configure the settings to connect the MYIRO-9/FD-9 using Ethernet.
The network name can be chosen freely.
You can decide to use DHCP or a fixed TCP/IP setup.
Please ask your network administrator in case of doubts.
After you finished to enter all details click "Set".
Restart your MYIRO-9/FD-9 by switching it OFF and then ON again.
To use the optional Ambient Light Adapter for MYIRO-1 you need to upload the calibration data to your instrument.
This is done using the MYIROtools software V1.30 or newer. The MYIROtools installer can be found here.
The calibration data of each adaptor is stored on a MYIRO server. Therefore you need a working internet connection to be able to download the data.
Download Ambient Light Adaptor Calibration Data
- Connect MYIRO-1 using the USB cable to your computer and switch it ON.
- Start MYIROtools Measure
- Scan for connected instruments
- Select your MYIRO-1
- Click Configuration
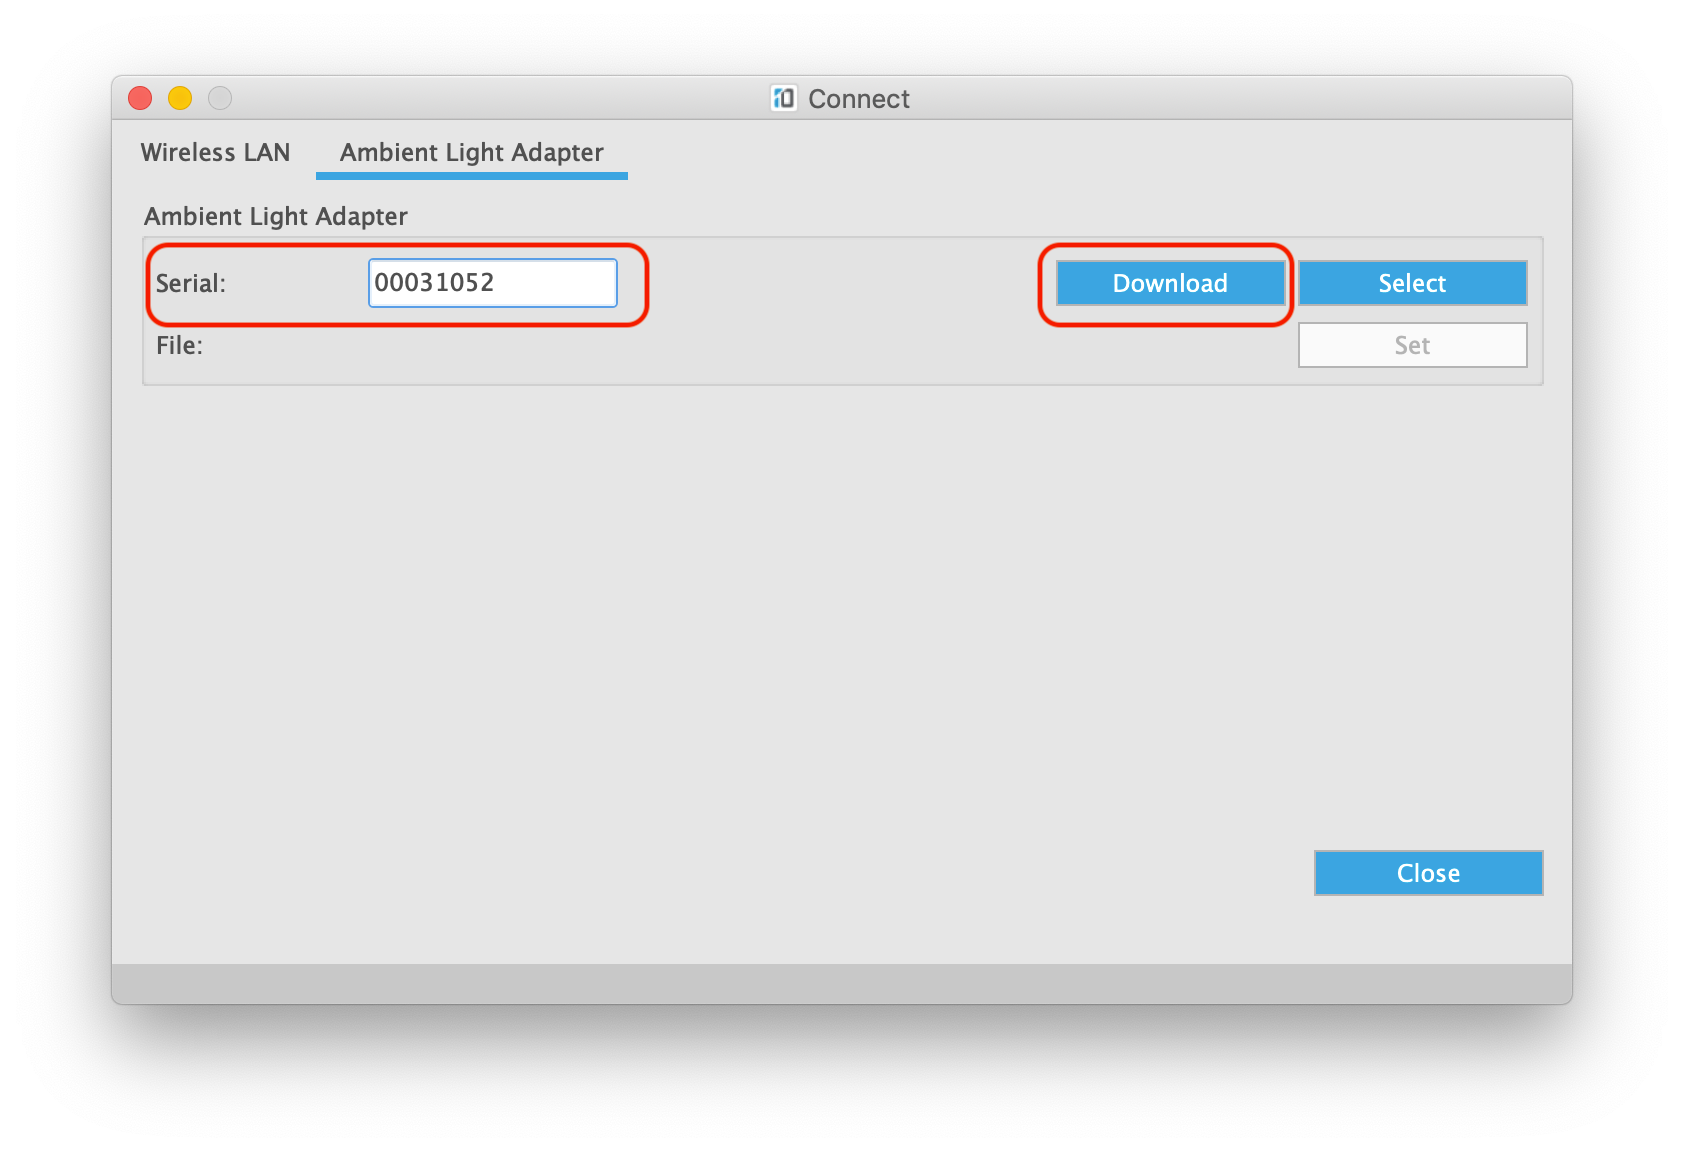
- Select the tab named "Ambient Light Adapter"
- Enter the serial number of your Adaptor which is written on its label
- Click "Download"
- Select a storage location on your computer
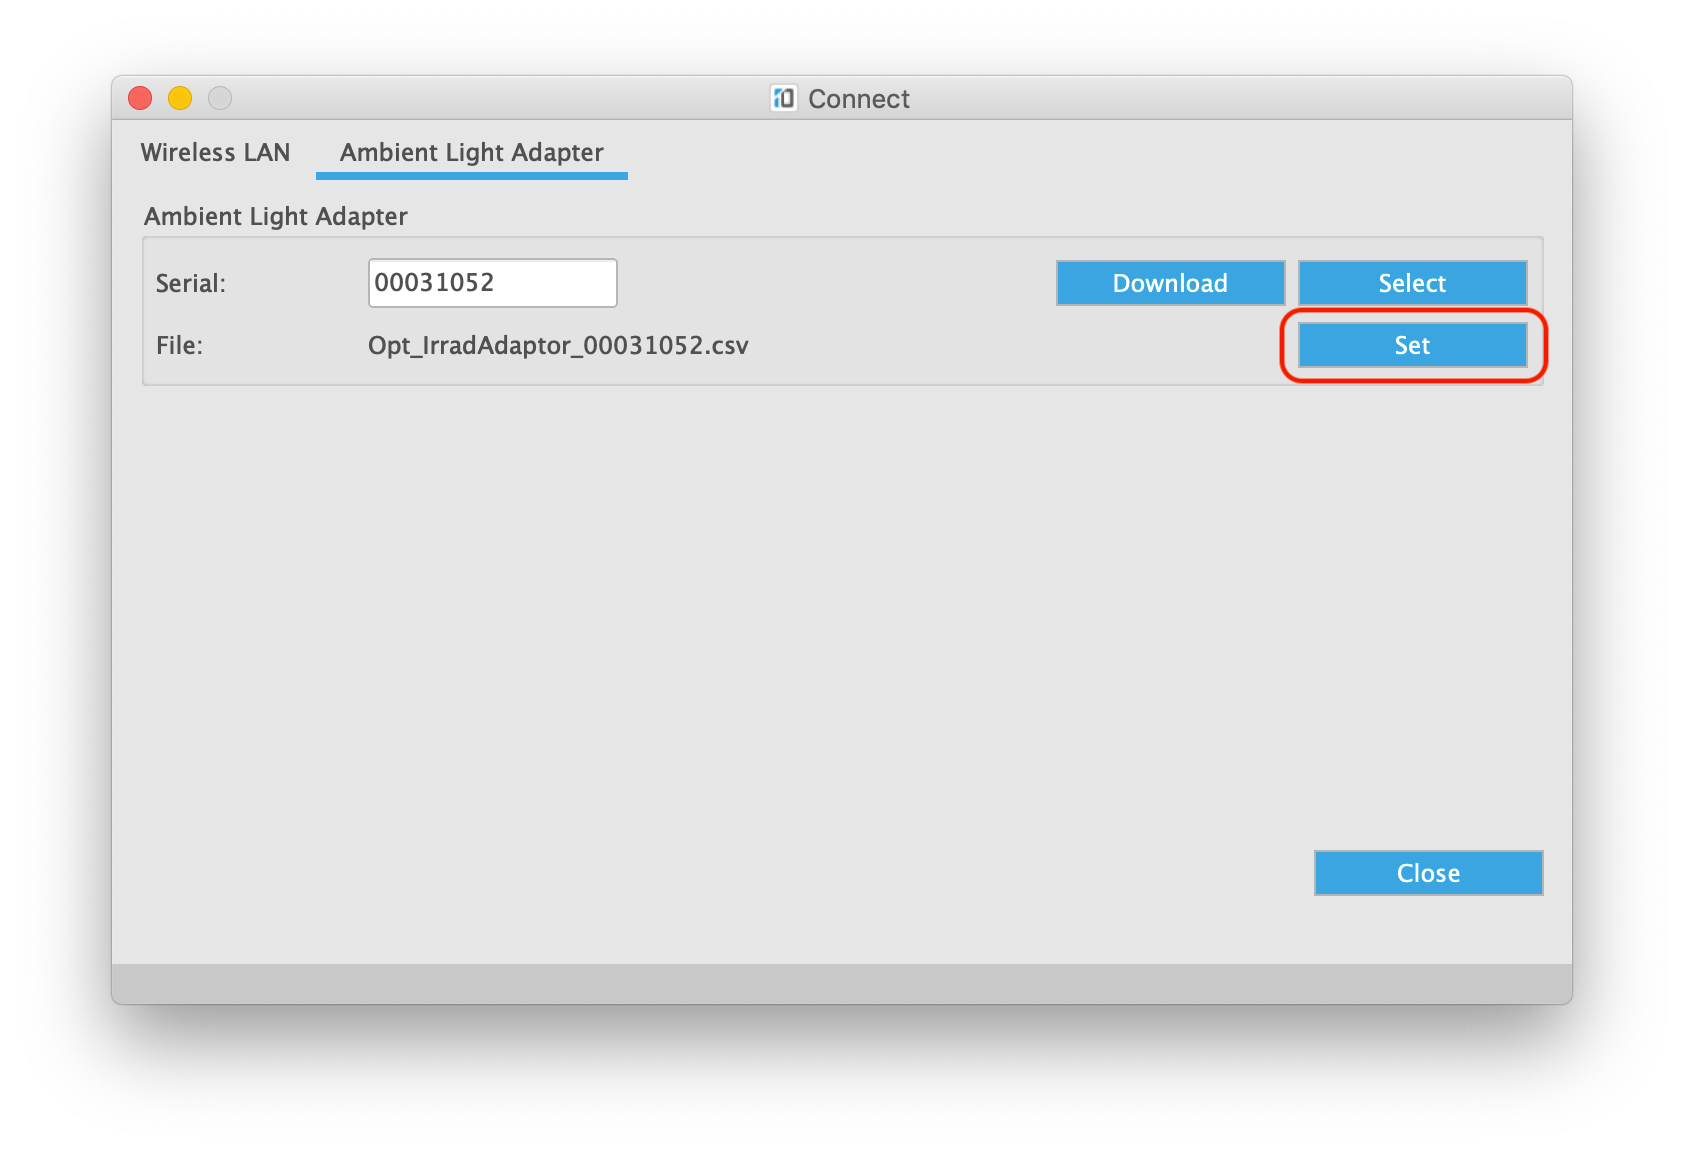
Upload Calibration Data to MYIRO-1
- Verify that the software shows a filename with the pattern "Opt_IrradAdaptor_000xxxxx.csv"
- Click "Set"
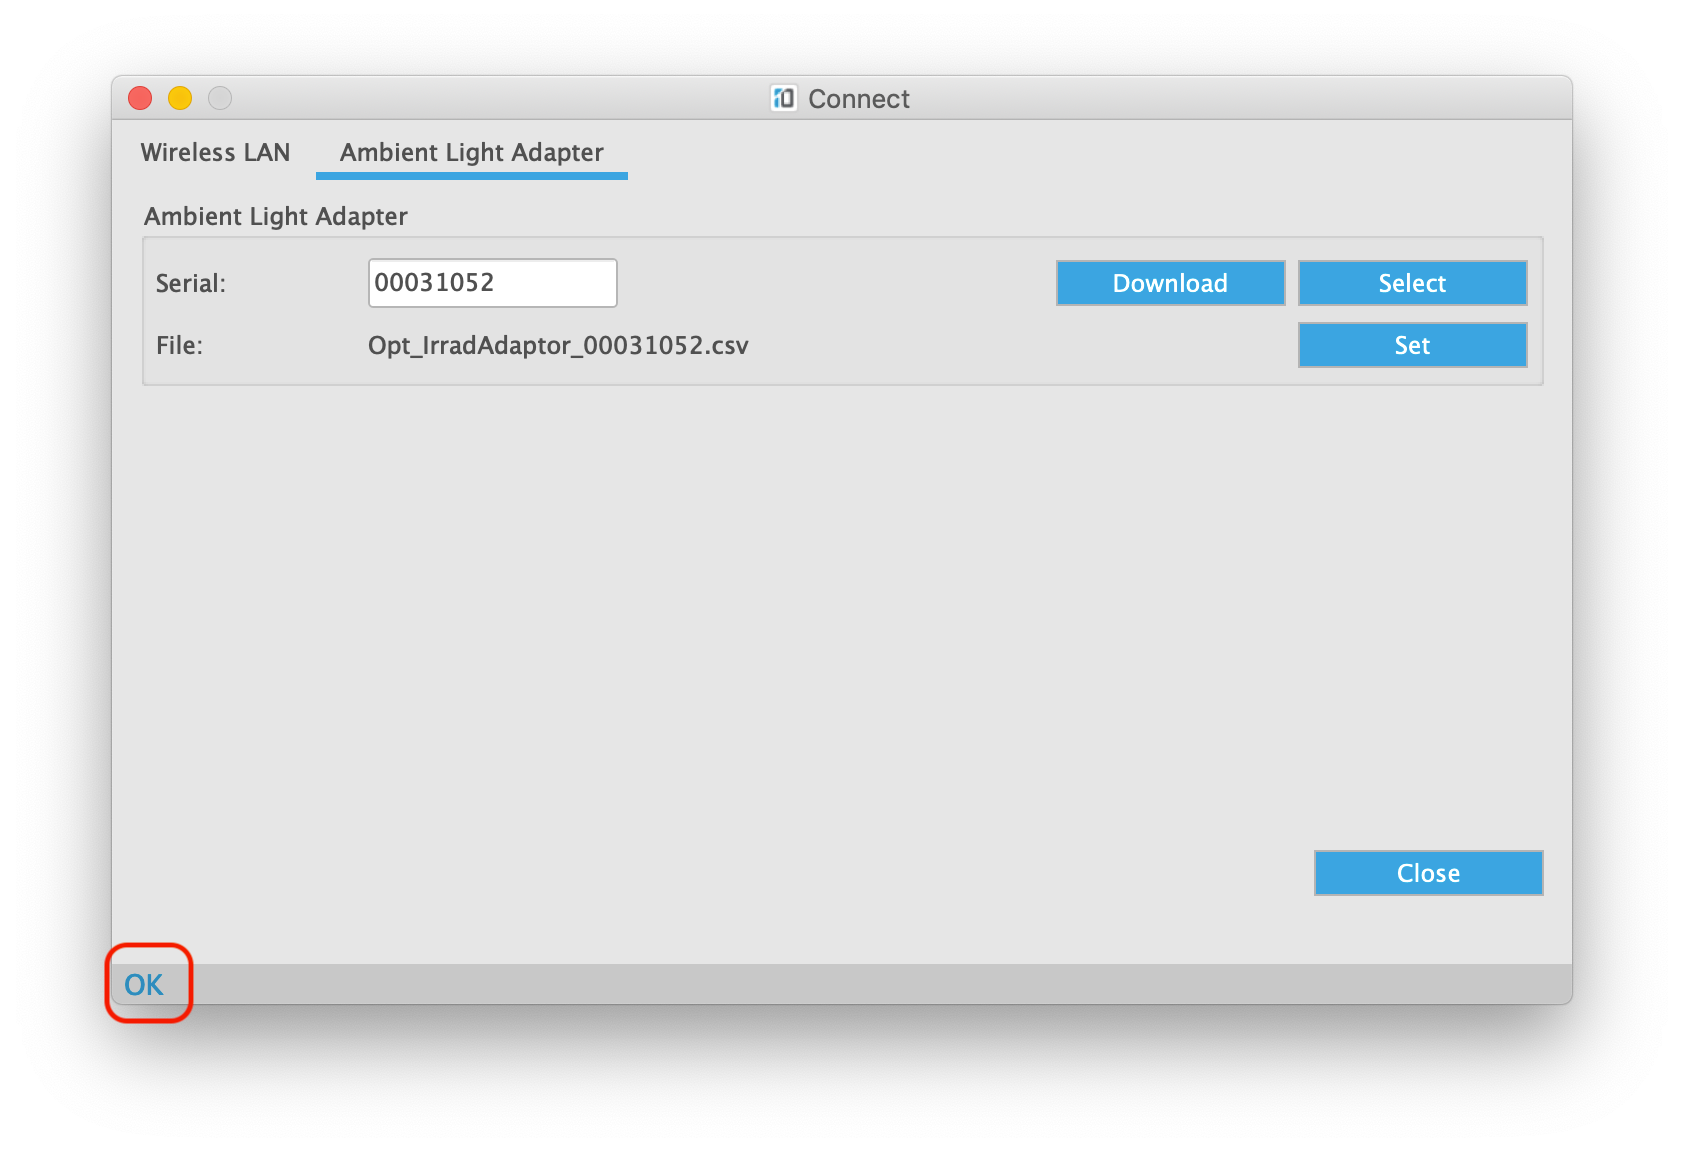
After successful upload
the software will confirm it by showing "OK" in the lower left corner.
You can now close the dialogue.
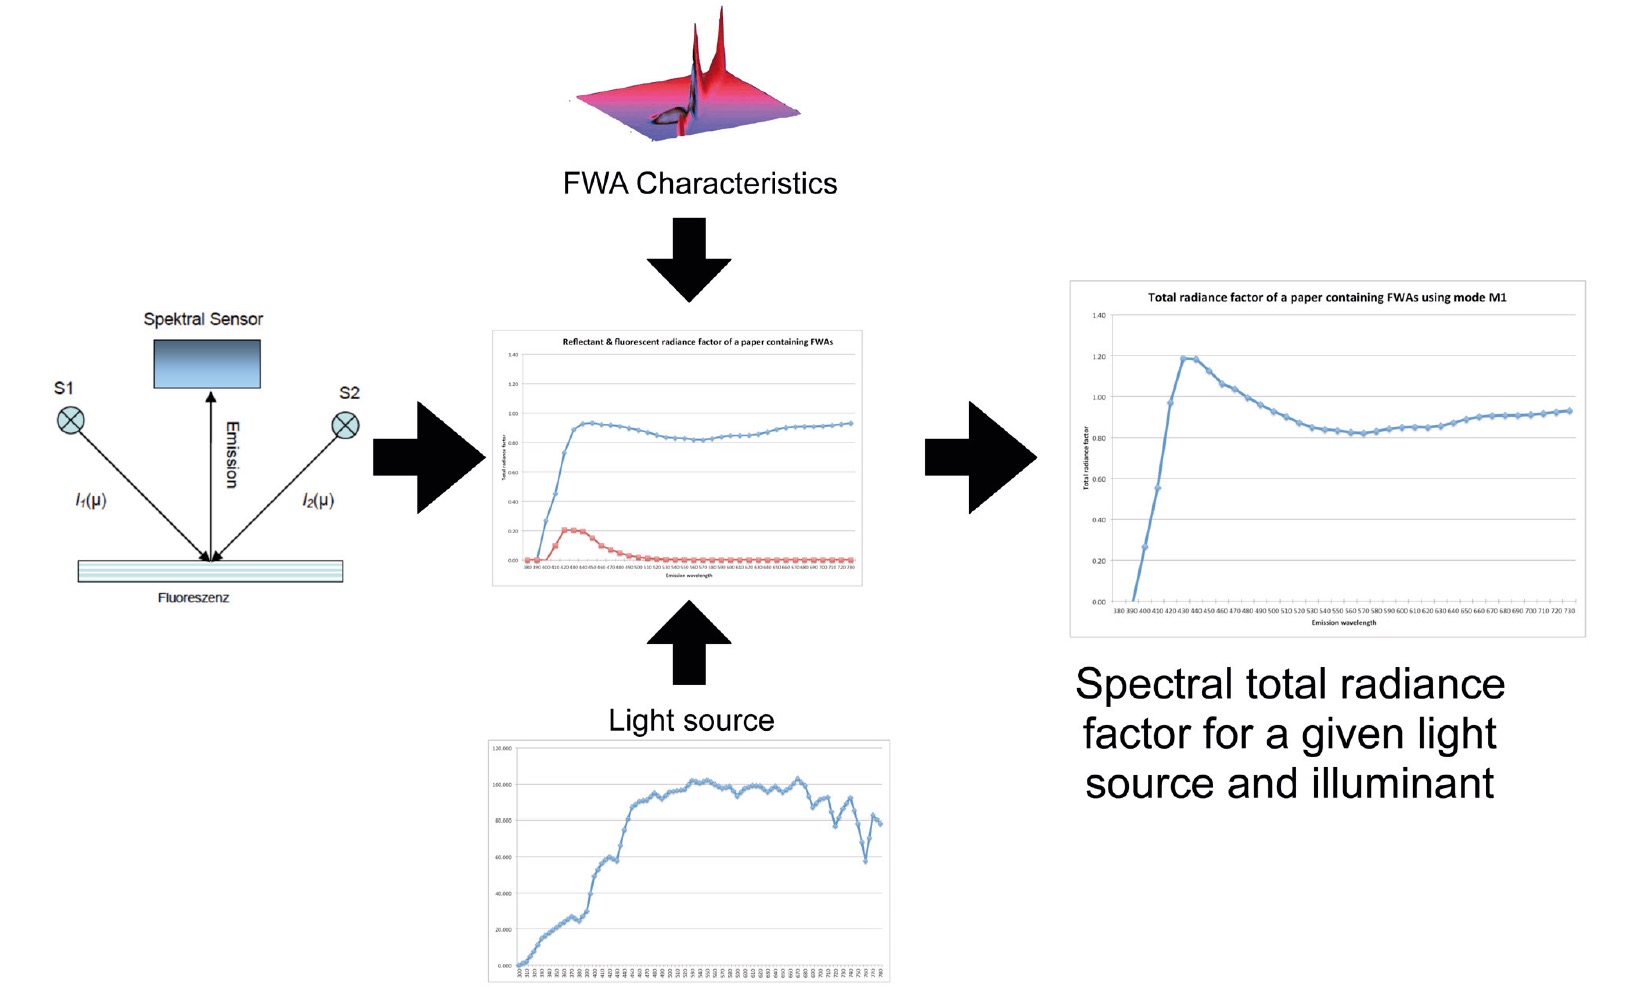
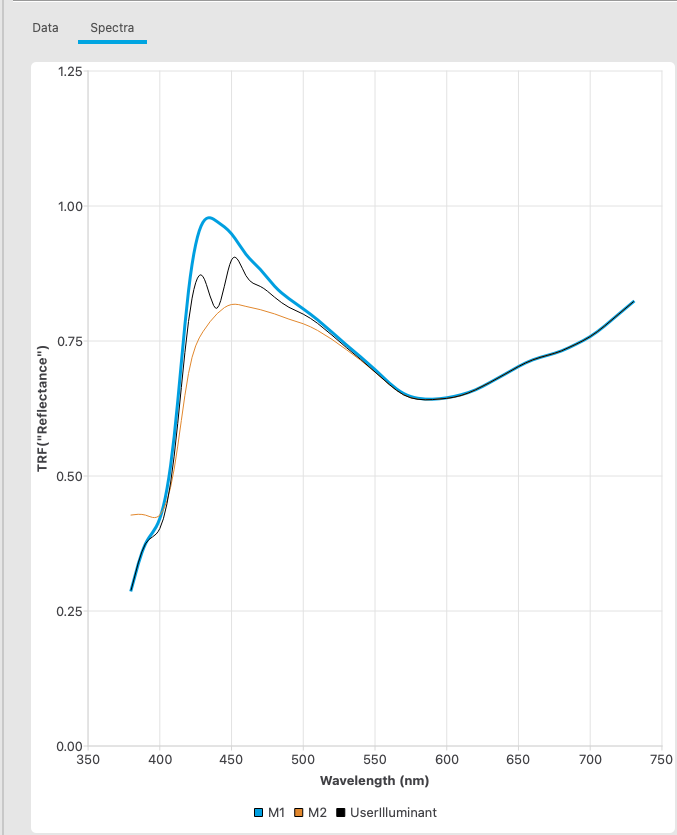
MYIRO instruments measure and stabilize the light sources used within them and having a stable base for the calculation ensures stable and repeatable measurements even if the physical light sources between different instruments differ.
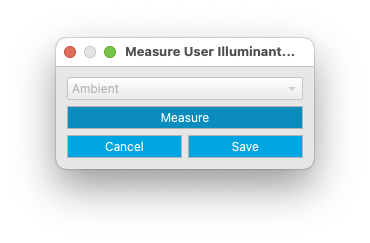
Using MYIROtools and a MYIRO-1 with ambient light adapter you can measure your viewing environment and calculate the color values for this viewing condition. This is called "User Illuminant".
Of course this also works for UV-free conditions. The "User Illuminant" will give you the color values that you perceive: Measure as we see.
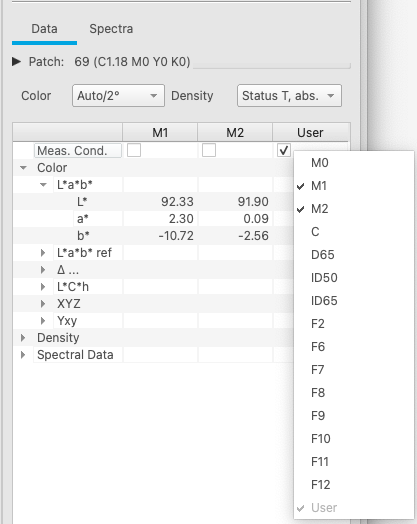
Open the tool "View" and select a measurement from the Data List window.
Make a right-click onto the columns showing the measurement conditions in the window "Patch Color".
Select "User".
Now the self-measured illuminant is used to calculate the color values for your sample in your viewing environment.